 How-to
7 Steps to Fix a Leaking Kitchen Faucet Handle
Last Updated: October 28, 2026
Quick Summary
A leaking kitchen faucet handle usually traces back to a worn O-ring, cartridge, or loose retaining nut. Tighten the retaining nut a quarter turn and retest, then replace the O-ring or cartridge if the leak continues. The repair typically takes 30 to 60 minutes.
- A leak under the handle points to the O-ring, cartridge, or retaining nut.
- A continuous leak while water runs usually means a worn O-ring.
- A drip when the faucet is off usually means a bad cartridge or valve seat.
- Pull the old cartridge first and match the model number stamped on it.
- If the shutoff valve won't close, call a licensed plumber instead of forcing it.
Table of Contents
- Why Your Kitchen Faucet Is Leaking at the Handle
- Single-Handle Kitchen Faucet Leak Repair: What Changes
- Safety and Preparation Checklist Before You Start
- How to Remove a Faucet Handle and Inspect the Retaining Nut
- How to Replace a Kitchen Faucet O-Ring
- Kitchen Faucet Cartridge Replacement: Step by Step
- Troubleshooting After the Repair: What to Check
- Schedule a Professional Faucet Repair with DC Plumbing
- Frequently Asked Questions
Why Your Kitchen Faucet Is Leaking at the Handle
A leaking kitchen faucet handle almost always traces back to one of three worn parts: an O-ring, a cartridge, or a retaining nut. Water escapes past the seal and runs out around the base of the handle instead of down the spout. This guide walks you through diagnosis and repair, from shutting off the water to testing the fix.
Diagnose first, then repair. The job usually takes 30 to 60 minutes once you have the right part.
Leak Under the Handle vs. Spout Drip
Where the water comes out tells you what failed. A leak under the handle points to the O-ring, cartridge, or retaining nut. A drip from the spout points to the cartridge or valve seat.
- Water around the handle base: the seal inside the handle assembly has failed.
- Water from the spout when the faucet is off: the cartridge or valve is not closing fully.
- Water under the sink: a supply line or shutoff valve issue, not the handle.
When the Leak Happens: On, Off, or Both
Timing narrows the diagnosis fast. A continuous leak while the water runs usually means a worn O-ring; a drip when the faucet is off usually means a bad cartridge or valve seat.
Where the water shows up and when it shows up narrows the diagnosis before you pick up a tool.
| Symptom | Likely cause | Note |
|---|---|---|
| Water around the handle base | Failed seal inside the handle assembly | Points to O-ring, cartridge, or retaining nut |
| Water from the spout when faucet is off | Cartridge or valve not closing fully | Points to cartridge or valve seat |
| Water under the sink | Supply line or shutoff valve issue | Not the handle |
| Continuous leak while water runs | Worn O-ring | Test with handle on, watch the base |
| Drip when the faucet is off | Bad cartridge or valve seat | Test with handle off, watch again |
Single-Handle Kitchen Faucet Leak Repair: What Changes
A single-handle faucet is simpler to repair: one cartridge controls both hot and cold water, so there is one part to inspect instead of two valve assemblies. The trade-off is that single-handle cartridges are model-specific, so you need the exact replacement part. Two-handle faucets often use standard O-rings and seats you can match at any hardware store.
Watch out: buying a generic cartridge that "looks close" is the most common reason a single-handle repair fails. Pull the old cartridge first, then match the model number stamped on it.
Identify Your Faucet Type Before You Buy Parts
Most kitchen faucets fall into one of three internal designs, each with a different wear part.
- Cartridge faucet (most common on modern single-handle models): a cylindrical cartridge slides into the valve body and mixes hot and cold. The wear parts are the cartridge itself and the O-rings on its stem. Replacement is a single-part swap.
- Ball faucet (common on older single-handle models, often with a rounded handle that moves in any direction): a metal or plastic ball with slots and rubber seats controls flow. The wear parts are the cam, packing, and seats, usually sold as a repair kit rather than individually.
- Compression faucet (typical on two-handle models): each handle turns a stem with a rubber washer at the bottom that presses against a valve seat. The wear parts are the washer and the seat. These are the easiest to match at a hardware store because the washers are sized by stem diameter.
To tell them apart without disassembly: a ball faucet handle pivots freely in a full circle, a cartridge handle moves in a limited arc, and a two-handle compression faucet has separate hot and cold stems.
Find the Correct Replacement Part
Once you know the type, match the part to the faucet, not to a similar-looking photo.
- Look for a model number. Check the underside of the faucet base, the escutcheon plate, or the tag on the supply lines under the sink. Many manufacturers also print the model on the cartridge body itself.
- Pull the old part and read the stamp. Cartridge bodies usually carry a manufacturer name and part number. Photograph it before you set it down.
- Use the manufacturer's parts lookup. Most major faucet makers publish an exploded parts diagram and a model-specific parts list on their website. Enter the model number and confirm the cartridge or repair-kit number before ordering.
- Match the kit, not just the seal. For ball faucets, buy the full repair kit (cam, packing, seats, springs) rather than a single O-ring, because the parts wear together.
What Changes for Two-Handle Faucets
On a two-handle faucet, the leak is usually isolated to one side. Test hot and cold separately: if only the hot side leaks at the base, you only need to service that stem. Compression stems use a washer and seat; cartridge-style two-handle faucets use a smaller cartridge per side. Either way, you can often fix the leaking side without touching the other.
Repair Difficulty, Time, and Cost Expectations
Set expectations before you start so you don't stall mid-repair waiting on a part.
- Time: a cartridge or O-ring swap on a single-handle faucet typically runs 30 to 60 minutes for a first-timer. A ball-faucet repair kit takes about the same. A compression washer swap is usually 20 to 30 minutes per side.
- Tools: Phillips and flathead screwdrivers, adjustable wrench, Allen keys, and a rag cover most jobs. A cartridge puller helps on stuck cartridges but isn't always required.
- Parts cost: O-rings and washers are cheapest, cartridge replacements cost more and vary widely by model, and ball-faucet repair kits sit in between. Check the manufacturer's parts page for current pricing.
Safety and Preparation Checklist Before You Start
Preparation separates a clean 40-minute repair from a flooded counter.
- Clear the cabinet under the sink
- Place a towel and small parts tray on the counter
- Locate both shutoff valves under the sink
Shut Off the Water Supply Valve
Turn both shutoff valves under the sink clockwise until they stop. Then open the faucet handle to release pressure and confirm the water is off. If the valves are stiff or won't shut off fully, stop and call a plumber. A valve that won't close can fail completely mid-repair.
Tools and Parts to Have Ready
You need very little: Phillips and flathead screwdrivers, an adjustable wrench, Allen keys, and a replacement O-ring or cartridge cover most faucets. Keep a rag handy for residual water.
How to Remove a Faucet Handle and Inspect the Retaining Nut
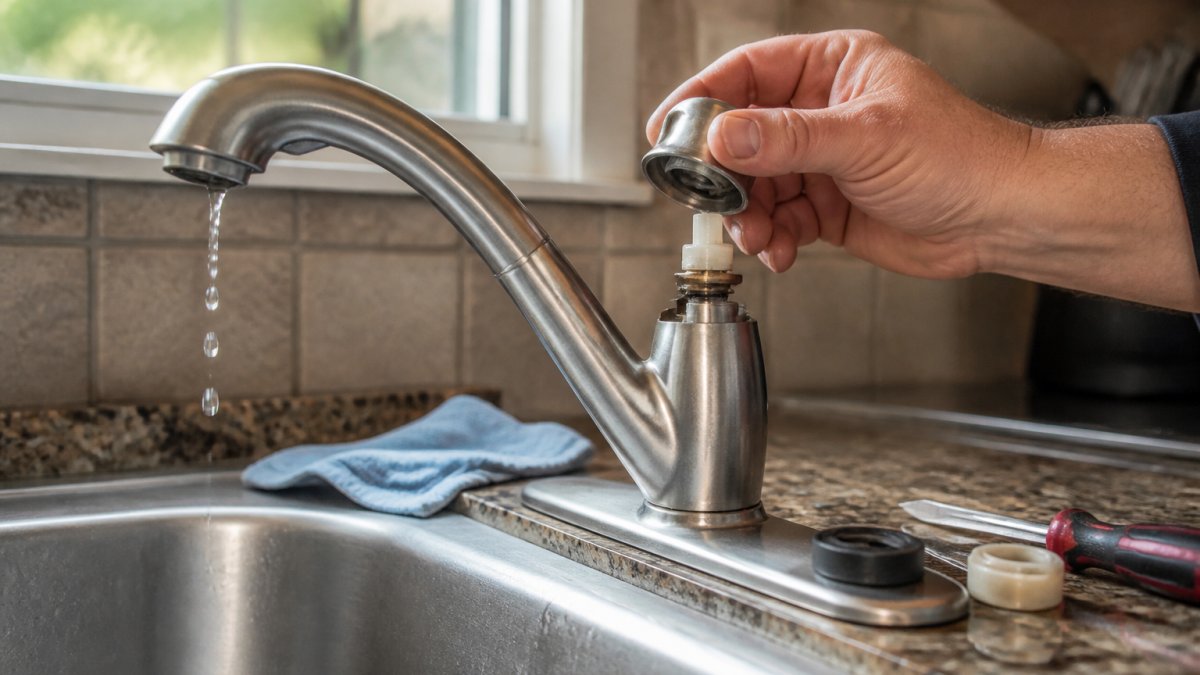
Removing the handle trips people up because manufacturers hide the handle screw in different places. Find the screw, remove the handle, and the retaining nut and cartridge are exposed.
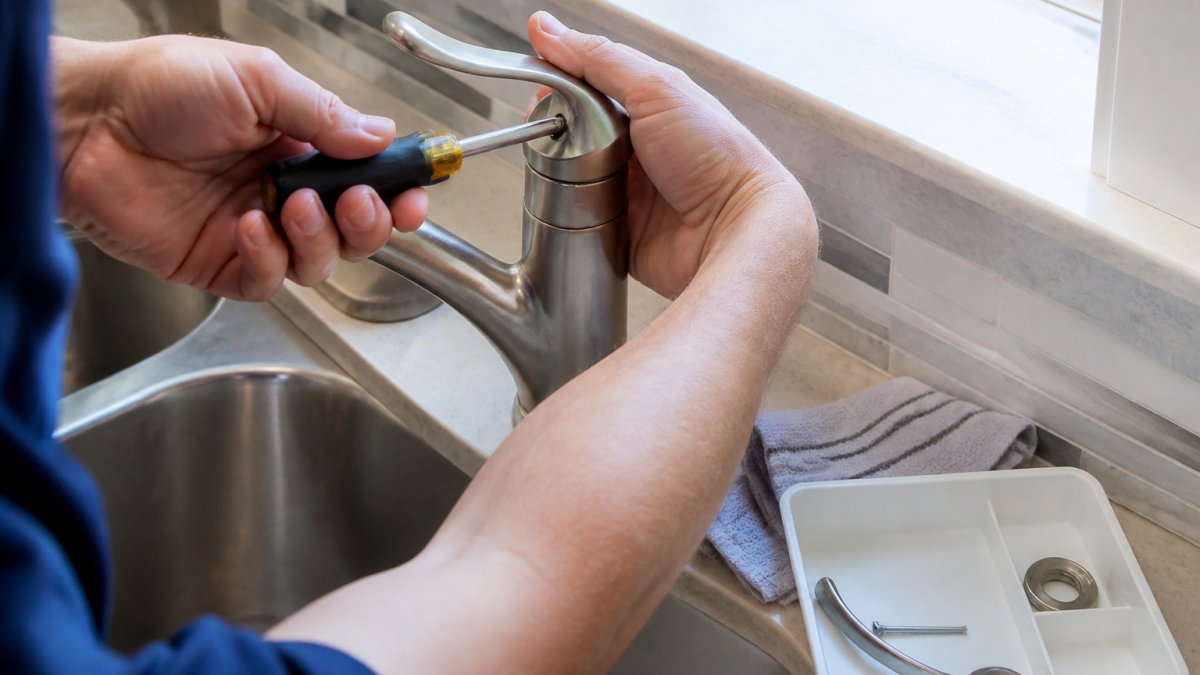
Locate and Remove the Handle Screw
The handle screw hides under a decorative cap on top of the handle, or behind a small set screw on the side. Pry off the cap with a flathead screwdriver.
Once the screw is out, lift the faucet handle straight up. If it sticks, wiggle gently. Do not pry with force, or you can crack the handle.
Loosen or Tighten the Retaining Nut
The retaining nut holds the cartridge in place, and a loose one causes leaks around the handle base. Tighten it a quarter turn and retest; if the leak stops, you're done. If not, loosen the nut fully, lift out the cartridge, and inspect the O-ring and nut threads for wear, cracks, or mineral buildup.
How to Replace a Kitchen Faucet O-Ring
An O-ring is a small rubber seal that stops water escaping around the cartridge stem. It's cheap and the easiest part to replace.
- Pull the old O-ring off the cartridge stem.
- Clean the stem with a cloth to remove buildup.
- Coat the new O-ring with a thin film of plumber's grease.
- Slide it into the same groove.
- Reassemble and test.
If the cartridge body itself is cracked or the stem is loose, an O-ring alone won't fix it. Move on to a full cartridge replacement.
Kitchen Faucet Cartridge Replacement: Step by Step
Cartridge replacement is the fix when a new O-ring and a tight retaining nut don't stop the leak.
- Shut off the water and remove the handle.
- Loosen the retaining nut and pull out the old cartridge.
- Note the orientation of the cartridge tabs.
- Match the model number to a new cartridge.
- Insert the new cartridge in the same orientation.
- Tighten the retaining nut snug, not overtight.
- Reinstall the handle and screw.
- Turn the water on slowly and test.
Difficulty is moderate. Expect 30 to 60 minutes and a part cost that depends on your faucet model. Check your faucet maker's parts page or a licensed plumber for the exact replacement.
Troubleshooting After the Repair: What to Check
If the leak persists after reassembly, work back through the likely causes in order. Most post-repair leaks come from a misaligned cartridge, trapped debris, a damaged valve seat, or an incompatible part, not a part that was "bad out of the box."
Still Leaking at the Handle Base
- Retaining nut not snug: tighten a quarter turn and retest, tight enough to seat the cartridge, not so tight it distorts the O-ring.
- O-ring rolled or pinched: pull the cartridge, inspect the O-ring for a flat spot or nick, and reseat it with a thin film of plumber's grease.
- Cartridge misaligned: the tabs or alignment pins must seat in the valve body slots. If the cartridge sits proud of the body, pull it and reinsert.
Drip From the Spout When the Faucet Is Off
A spout drip after a cartridge swap usually means the new cartridge isn't closing fully. Check three things: the cartridge is the correct model, it's installed in the same orientation as the old one, and no debris is trapped between the cartridge and valve seat. A damaged valve seat, a scratch or mineral buildup where the cartridge seals, will drip even with a new cartridge and may need cleaning or replacement.
Low Water Pressure After Reassembly
- Aerator clogged: debris loosened during the repair can lodge in the aerator screen. Unscrew the aerator, rinse the screen, and reinstall.
- Cartridge ports misaligned: if the cartridge is rotated out of position, the hot and cold ports won't line up and flow drops. Recheck orientation against the old part.
- Supply valve not fully open: confirm both shutoff valves under the sink are turned fully counterclockwise.
New Leak Under the Sink
A leak under the sink after the repair is almost always a supply connection you disturbed. Check the supply line nuts at the shutoff valve and faucet tailpiece, and confirm quick-connect fittings are fully seated. Wipe dry and watch for a minute with the water on.
When the Repair Doesn't Hold
If you have replaced the cartridge and O-ring and the leak returns within days, the cause is usually one of these:
- Incompatible part: a cartridge that fits physically but is not the correct model will leak or fail early. Recheck the model number against the manufacturer's parts list.
- Damaged valve body or seat: cracks, deep scratches, or heavy mineral buildup cannot be fixed with a new seal; the faucet itself may need replacement.
- Debris in the lines: sediment can score a new seal. Flush the lines briefly before installing the new cartridge.
Prevention: Keep the Handle From Leaking Again
- Turn the handle gently and avoid forcing it past its stops, which stresses the cartridge and O-rings.
- Wipe mineral buildup from around the handle base periodically; buildup can work into the seal.
- Check the supply connections under the sink a few times a year for moisture.
Before you button up the job, walk through a broader residential plumbing maintenance checklist to catch other small issues before they become emergencies. A few minutes of prevention now beats a weekend repair later.
Schedule a Professional Faucet Repair with DC Plumbing
Some leaks are not a DIY job. If the shutoff valve won't close, the retaining nut is seized, or the leak returns after a cartridge swap, call a licensed technician.
Before you hire anyone, it helps to know how to choose a reliable plumber and how to avoid surprise plumbing charges. It also pays to understand how to verify plumbing warranty coverage so your repair is protected.
At DC Plumbing Heating and Air Conditioning, our licensed and certified technicians provide plumbing service across South Orange County.
Get started with DC Plumbing Heating and Air Conditioning. Call today.
Frequently Asked Questions
Why is my kitchen faucet leaking around the handle?
The most common cause is a worn O-ring or cartridge seal inside the handle assembly. When the O-ring dries out or cracks, water escapes around the handle base instead of flowing only through the spout. A loose retaining nut can also allow water to seep past the seals. Identify whether the leak happens when the faucet is on, off, or both, because that timing points to different parts. Replacing the O-ring or cartridge usually stops a leaking kitchen faucet handle.
Can a worn O-ring cause a faucet handle to leak?
Yes. The O-ring sits around the valve stem or cartridge and seals the gap between the handle and the faucet body. Over time, friction and minerals wear it down, so water leaks under the handle when you turn the faucet on. Replacing the O-ring is one of the simplest fixes for a kitchen faucet leaking at handle level. Turn off the water supply valve first, remove the handle, and match the old O-ring to a new one at a hardware store.
How do I know if my kitchen faucet cartridge needs replacing?
A bad cartridge usually causes a drip from the spout even when the handle is fully closed, or the handle feels stiff or loose. If tightening the retaining nut and replacing the O-ring does not stop the leak, the cartridge is the next part to replace. Kitchen faucet cartridge replacement requires shutting off the water, removing the handle and retaining nut, and pulling the old cartridge straight out. Take the old cartridge to the store to match the model.
Should I turn off the water before repairing a leaking faucet handle?
Always shut off the water supply before disassembly. Locate the shutoff valve under the sink and turn it clockwise until it stops. If the valve is stuck or missing, shut off the main water supply to the house. Turning off the water prevents a continuous leak and water damage while the handle is off. After the repair, open the valve slowly and check for drips at the handle and spout before reassembling everything.